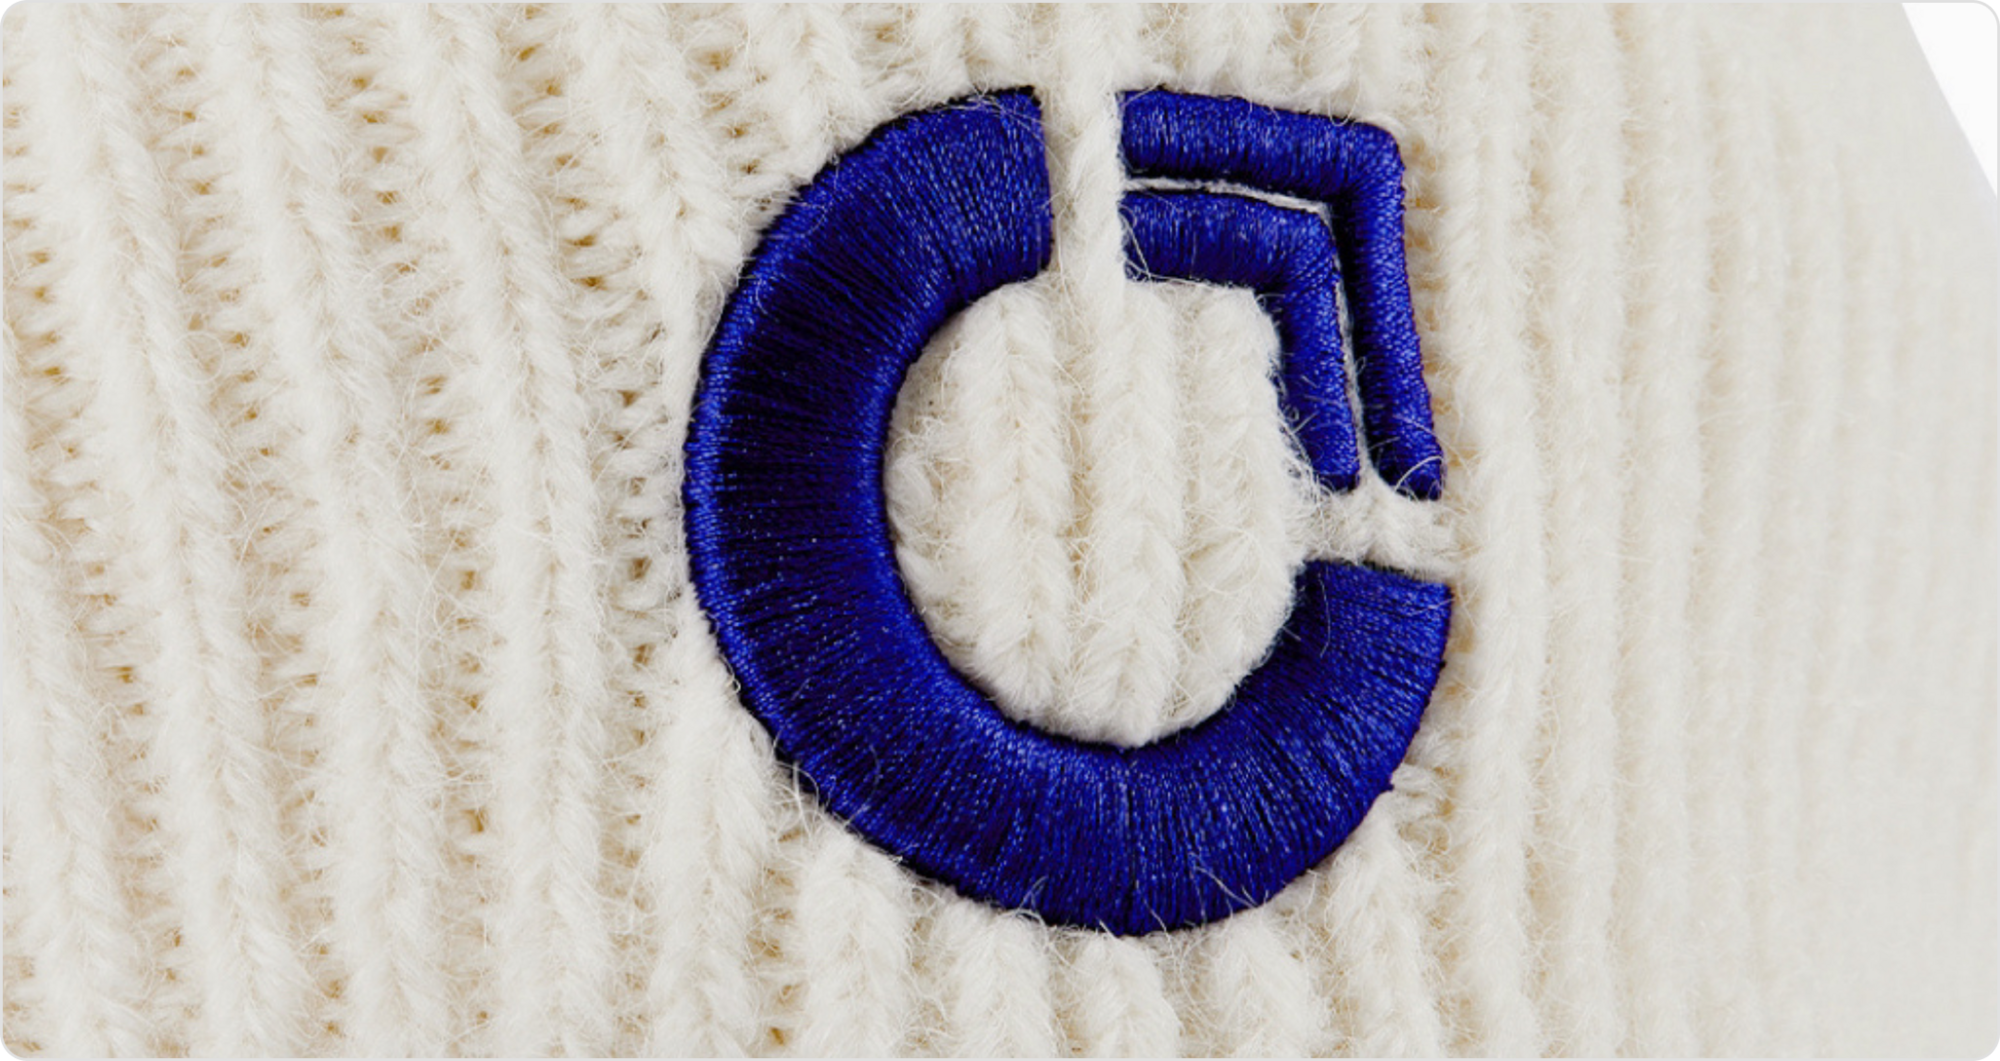
3D puff embroidery

3D puff embroidery is a design technique commonly used to customize textile-based products such as apparel or hats. Using this technique, you can create “raised” designs that have a three-dimensional and textured look.
In this guide, we’ll share everything you need to know about this unique, eye-catching technique, including how the effect is created, what makes it different from traditional flat embroidery, and how to utilize it for your next custom product.
What is 3D puff embroidery?
3D puff embroidery (also sometimes known as foam embroidery) is a specialized embroidery technique. It uses a foam insert, which is cut to the shape of the design and then placed on top of fabric. Thread is then stitched on top of the foam insert, creating a raised, three-dimensional “puffy” effect.
How is 3D puff embroidery done?
Below, we share a step-by-step breakdown to help you understand the 3D puff embroidery process.
1. Set the foundation with flat embroidery
We begin the process for 3D puff embroidery with flat embroidery. A stable base is created by stitching a flat design onto the chosen product. This will serve as the “foundation” for the foam insert.
2. Cut and apply the foam on top of the foundation
A piece of foam, cut to the shape of the design, is then placed on top of the flat embroidery foundation.
3. Embroider on top of the foam insert
Next, we stitch the foam insert onto the fabric of the product to hold it in place. Then, the embroidery process begins. Thread is stitched neatly (“embroidered”) on top of the foam, creating the 3d puff embroidery effect.
4. Remove excess foam and add final touches
After stitching is completed, we remove excess foam. Final touches may be added to complete the design.
Differences: 3D puff embroidery vs. 2D flat embroidery
There are two differences between 3D puff embroidery and 2D flat embroidery:
- Depth/dimensionality - As the names imply, 3D puff embroidery is raised, whereas 2D flat embroidery lays flat.
- Complexity - Due to limitations in the process, 3D puff embroidery is best for simple designs. Meanwhile, 2D flat embroidery can usually support more intricate designs.
With these differences in mind, should you go for a 3D puff embroidery design that stands out despite being simple? Or, should you go for a more subtle, flat embroidery design that is more complex?
The right technique will ultimately depend on your design, but to help you make the decision, we’ve compiled some of the key differences between 3D puff embroidery and 2D flat embroidery below:
What kind of designs are suitable for 3D puff embroidery?
When creating a design for 3D puff embroidery, it helps to consider the size and complexity of your design. Specifically, we recommend:
- Simple and bold designs - Designs with simple, clear outlines are best, as the foam makes it difficult to produce small details. Consider: Geometric shapes, large blocky letters or numbers, simple icons
- Large text and lettering - If you’re going to create a text-based design, consider using a large, bold font to maximize the eye-catchiness of your design. While medium-weight fonts are also acceptable, fonts with thin lines should be avoided.
- Solid colors - Use solid colors for 3D puff embroidery.
Keeping these factors in mind will help ensure that your proposed design isn’t too complex or difficult for puff embroidery.
How to prepare your design for 3D puff embroidery
Here are some general guidelines for preparing your design for 3D puff embroidery:
- Replace all gradients with solid colors
- Reduce the total number of colors (the max limit depends on your platform or supplier)
- Remove intricate details
- Increase text size and/or weight
- Remove/reduce gaps between design elements
What kind of products can 3D puff embroidery be used on?
Products made from stiffer, heavyweight fabrics are great candidates for 3D puff embroidery, which is why you will commonly see puff embroidery used to decorate baseball caps and hats.
While heavyweight sweatshirts and hoodies can also be 3D puff embroidered, these items are less ideal as they are more frequently exposed to high temperatures and/or washed, which can damage the design.
Avoid using 3D puff embroidery on products made out of lightweight textile, such as t-shirts. The fabric in such products likely cannot hold the weight of the foam and double stitching. Therefore, it’s best to pick products made of a sturdier material that can support the foam without collapsing or tearing.
FAQs about 3D puff embroidery
Interested in using 3D puff embroidery for your next custom product through Wayo?
Here’s what you need to know if you’re placing a catalog product order.
1. Are there any color limitations for 3D puff embroidery?
At Wayo, we can support up to 5 solid colors in a single design.
2. What happens if my design has fine details?
If your design is complex or intricate, it’s best to consider a different customization method, as the use of foam can distort fine details.
3. Can 3D puff embroidery be combined with flat embroidery?
Yes, you can combine 3D puff embroidery with flat embroidery. However, the 5 solid color restriction still applies.
5. Do these restrictions apply to fully custom products?
It depends on your request! Our goal is to help you turn your vision into a reality, and we will do our best to help you source and create the perfect product, whether it’s a hat, bag, or jacket!
Submit a fully custom request if you are interested in using 3D puff embroidery for your next 100% custom project.
As a general rule of thumb, your project is more likely to be possible if:
- Your desired product is crafted from a sturdier, heavyweight material
- Your design is on the simpler side
- You are open to considering other customization methods
*Minimum order quantity for fully custom requests typically starts at 1,000 units.